Smart STB Instructions
You can find the Smart STB instructions on this page. The app is compatible with most devices today, but it is only recommended if there are no other app options available. This app allows you to stream channels on your IPTV device, providing a basic way to access your IPTV content. However, for a smoother and more enhanced viewing experience, we suggest exploring other apps that may offer better functionality and performance.
Smart STB Setup Guide
Stream effortlessly with Smart STB on any supported device.
General Instructions for Smart STB
A step-by-step guide to easily stream IPTV on Smart STB.
Smart STB is compatible with a wide range of devices today, making it fairly accessible for most users. The app is simple to set up and highly recommended for those who are already familiar with it. However, it may not be the easiest for beginners to get started with. We suggest starting with IPTV Smarters for ease of use, then transitioning to a more advanced app like Tivimate, which offers a better interface and more stability as you become more comfortable with IPTV services.

This page includes guides to help you get started with Smart STB on your specific device, whether you’re using Apple TV, Smart TV, or any other supported device. We’ve compiled all the necessary instructions to ensure you can quickly set up Smart STB on your system.
Here are the devices you can use with Smart STB:
- Apple TV
- Smart TV
- Nvidia Shield
- Xiaomi Mi Box
- Xiaomi Mi Stick
- Firestick
- Android Box
- Mobile Phone
- Tablet
The app can be downloaded from the Play Store. While Smart STB is one of the more advanced apps available, it is still relatively straightforward to use. The app lets you upload your IPTV channels in two ways:
- M3U link
- Portal URL (through the app or their website)
We recommend loading your IPTV channels directly through the portal for the best experience. Follow the steps below to get started:
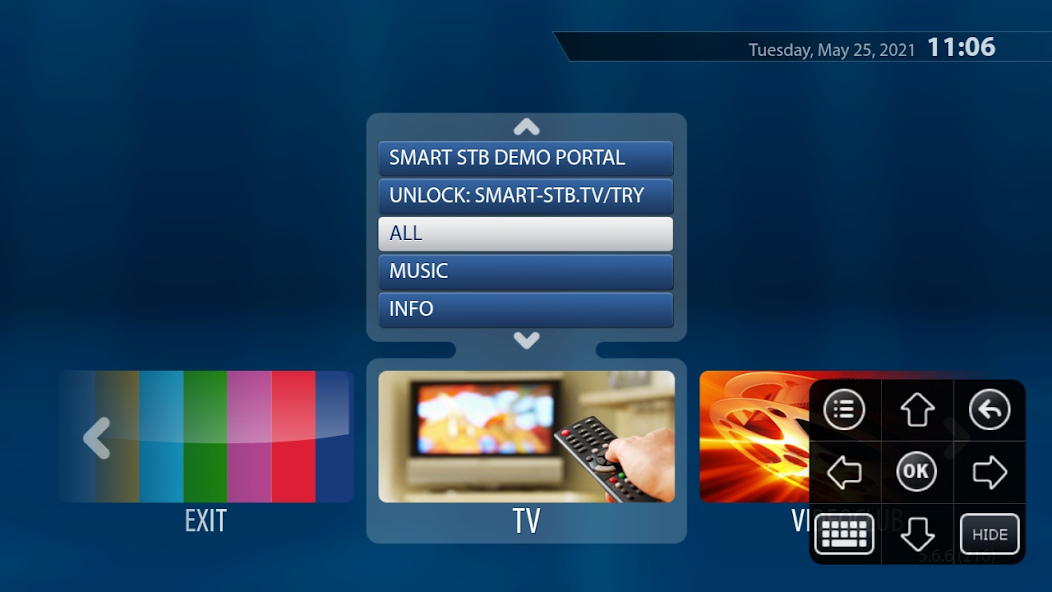
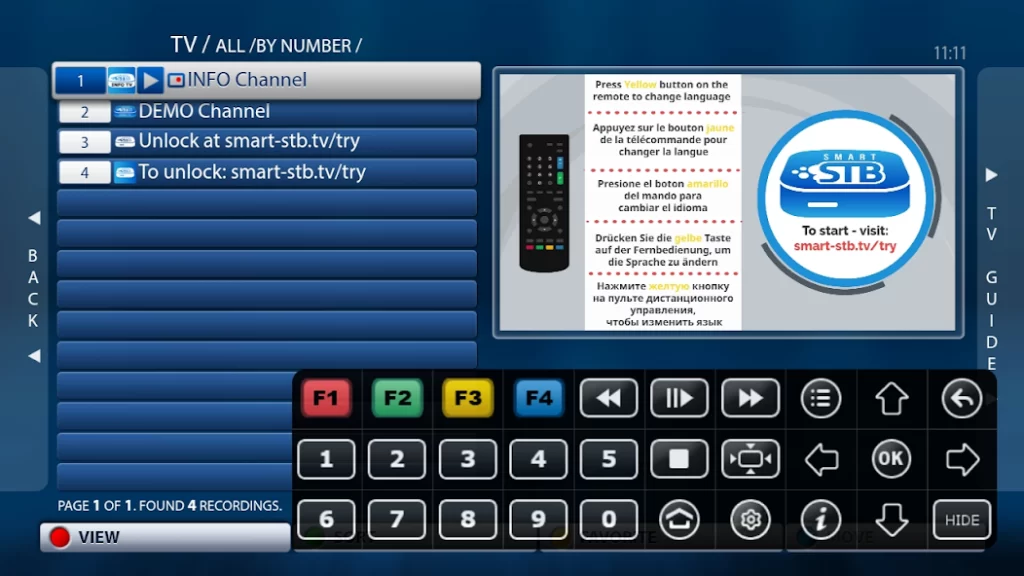
Step 1: Download and open the Smart STB app. Once launched, a box will appear. If it doesn’t disappear automatically, press the “OK” button. Accept the app’s terms when prompted, and also confirm that you want a 7-day free trial of the app.
Important: You will need to obtain your Virtual MAC Address and enter it when you request your free trial or purchase our service. This is essential for the setup.
Setup Instructions:
Step 1: Open the app and note your MAC address displayed in the middle of the screen (e.g., ending with 77:27).
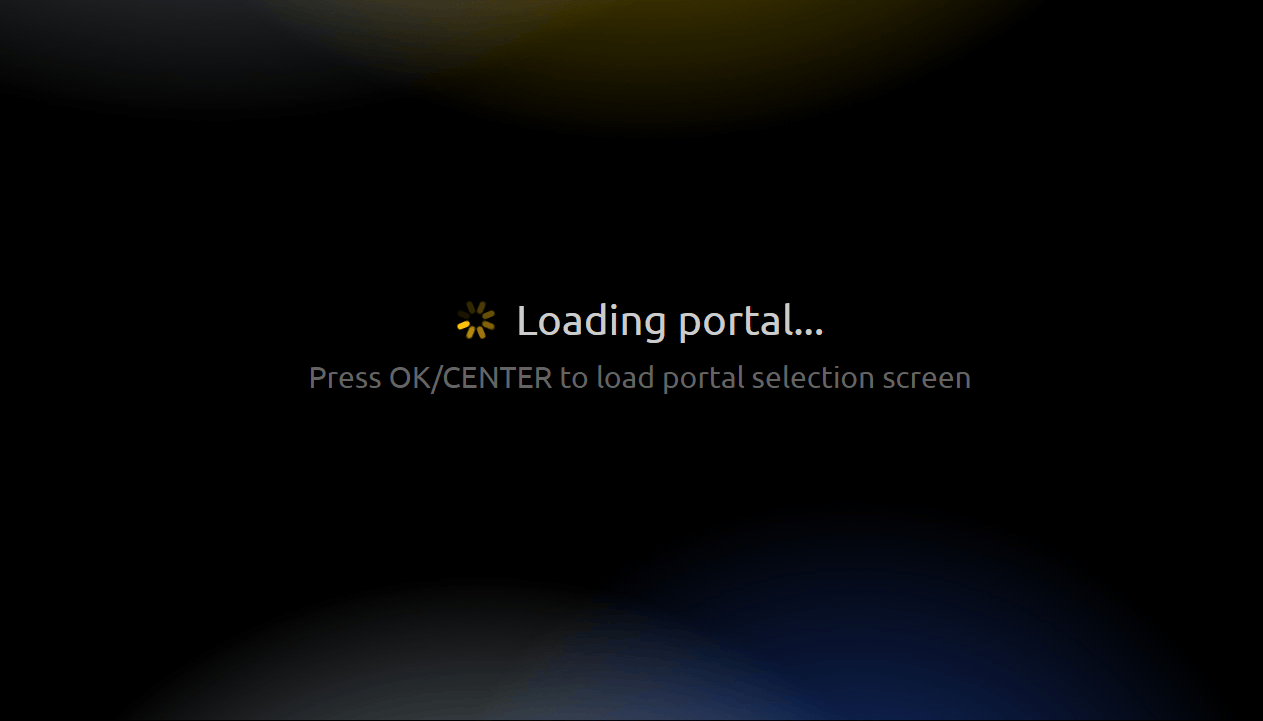
Step 2: After pressing “OK”, you’ll be taken to the settings menu. If you miss this step, the app may freeze with a black screen. If this happens, you may need to restart the app or, in the worst case, restart your device by unplugging the power cord.
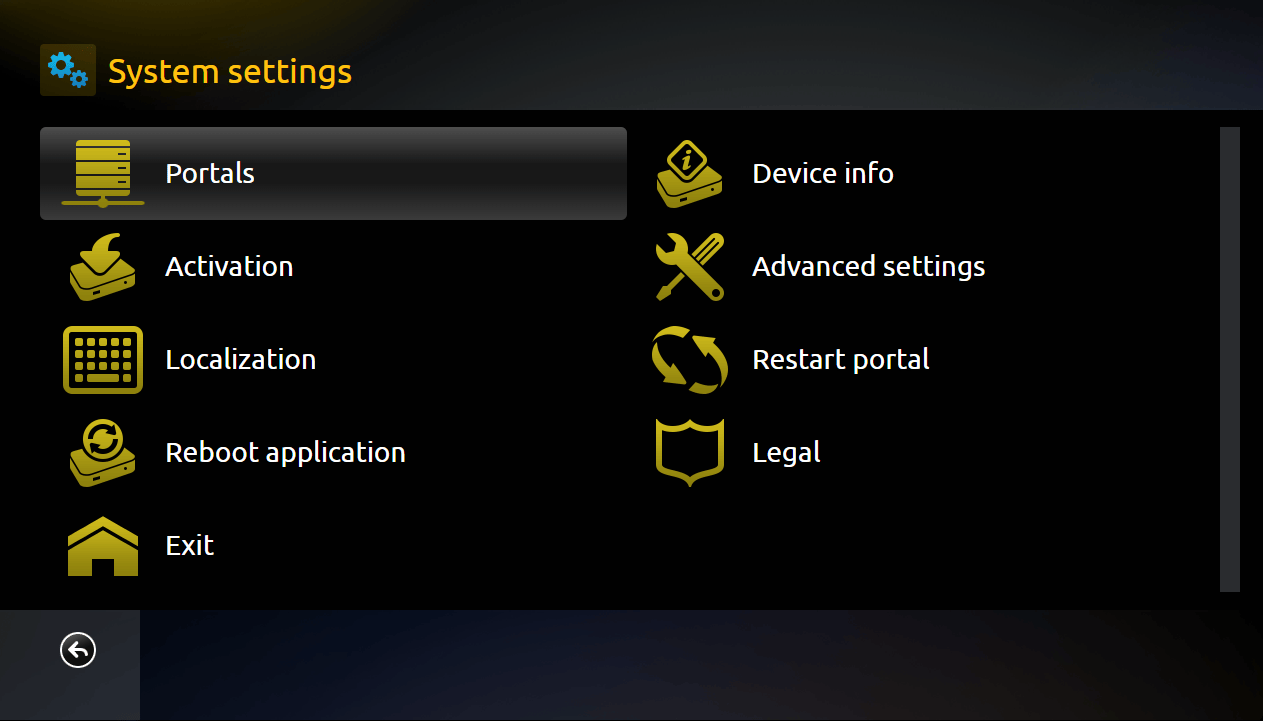
Step 3: Select Device Info to retrieve your Virtual MAC address. Make sure to note it down carefully and verify the spelling.
Next, choose Embedded Portal to access the settings where you can add a portal URL. Select Portals to proceed.
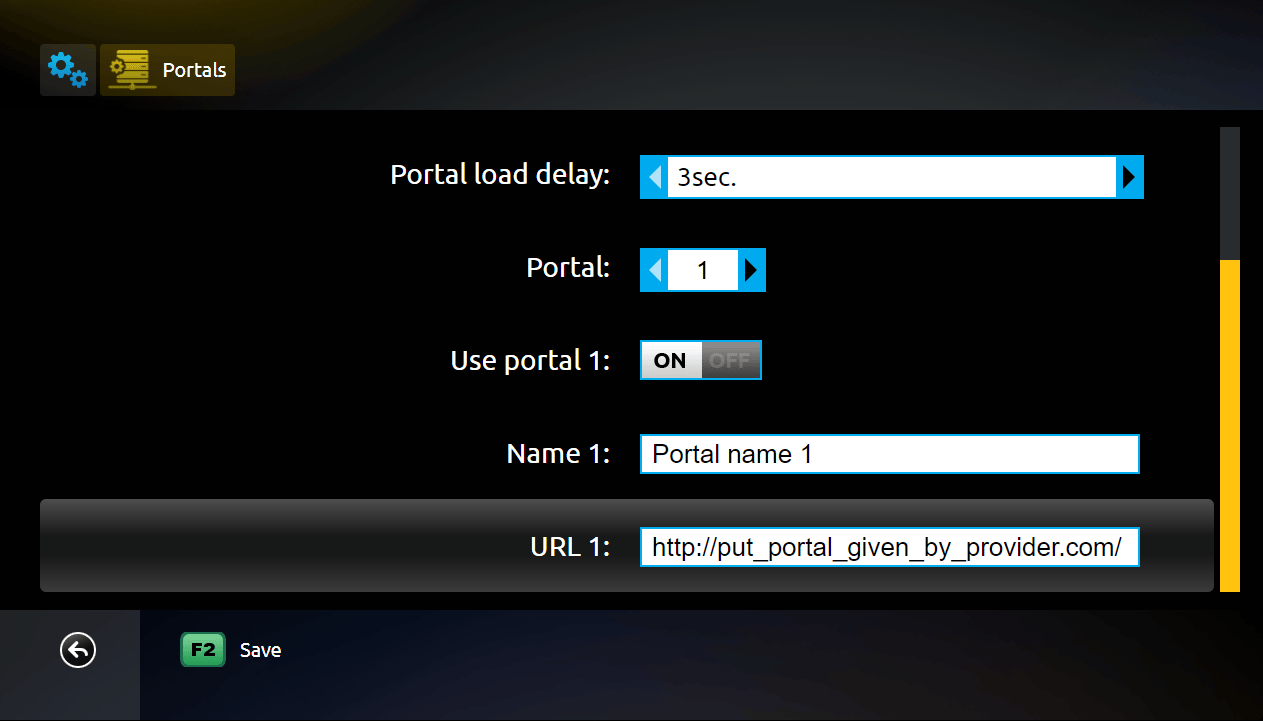
Step 4: Enable Multiportal mode and ensure that Use Portal 1 is activated. You’ll then be able to add the portal URL by scrolling further down the page.
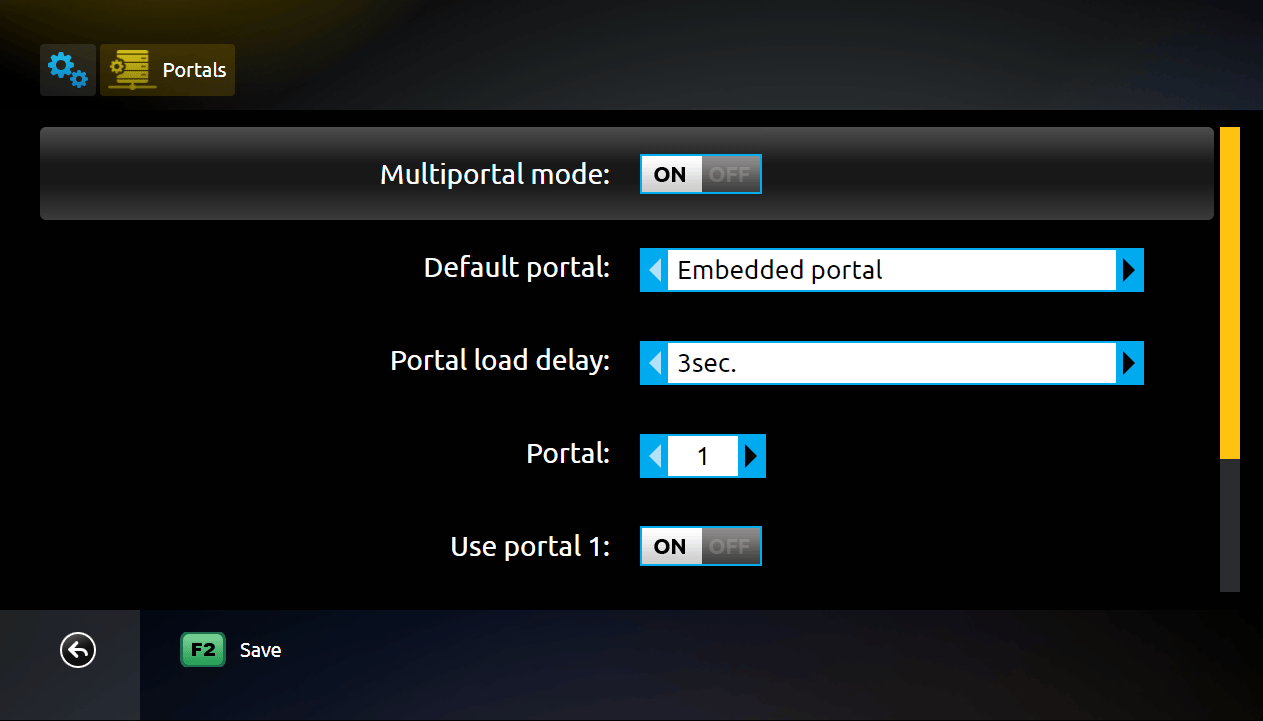
Step 5: In the Name field, type “svenskiptv.com”. In the URL 1 field, input the Portal URL you received when you requested a free test or purchased our service.
To activate Smart STB and test our service, you must enter your Virtual MAC address (beginning with 00:1A:79) on our website after selecting Smart STB in the menu at the link below: www.svenskiptv.com/packages
Where to Download the App
Smart STB can be downloaded from the Play Store and App Store for most devices, though we do not recommend using it on Apple devices. Always download from trusted sources like the App Store or Play Store to avoid the risk of downloading malicious software. To download Smart STB to your device, click the appropriate link below:
Smart TV
Smart STB on Smart TVs can be a reliable option when other apps are unavailable, providing a decent streaming experience. The app is designed to perform well on Smart TVs and offers relatively smooth operation on most models. However, it can be a bit tricky for beginners to set up, requiring a bit of patience. The app is available on LG, Sony, Samsung, and Philips TVs, making it a versatile choice for many users. Despite its compatibility, we recommend considering a better alternative app like Tivimate for a more user-friendly experience and improved stability.
Specifications:
- App: Smart STB
- Installation time: Approx. 10 minutes
- Wifi/Cable: Supports both connections
- Cost: SEK 245
- Offers free trial: Yes
Setup Instructions:
Step 1: Download and open the Smart STB app. Once launched, a box will appear. If it doesn’t disappear automatically, press the “OK” button. Accept the app’s terms when prompted, and also confirm that you want a 7-day free trial of the app.
Important: You will need to obtain your Virtual MAC Address and enter it when you request your free trial or purchase our service. This is essential for the setup.
Step 2: After pressing “OK”, you’ll be taken to the settings menu. If you miss this step, the app may freeze with a black screen. If this happens, you may need to restart the app or, in the worst case, restart your device by unplugging the power cord.
Step 3: Select Device Info to retrieve your Virtual MAC address. Make sure to note it down carefully and verify the spelling. Next, choose Embedded Portal to access the settings where you can add a portal URL. Select Portals to proceed.
Step 4: Enable Multiportal mode and ensure that Use Portal 1 is activated. You’ll then be able to add the portal URL by scrolling further down the page.
Step 5: In the Name field, type “svenskiptv.com”. In the URL 1 field, input the Portal URL you received when you requested a free test or purchased our service.
To activate Smart STB and test our service, you must enter your Virtual MAC address (beginning with 00:1A:79) on our website after selecting Smart STB in the menu at the link below: www.svenskiptv.com/packages
Other Devices
Nvidia Shield: Using Smart STB with Nvidia Shield may not be the best solution. The app can be challenging to set up, especially for beginners. While it functions well once installed, we recommend considering a better alternative like Nanomid for a more streamlined experience and easier setup.
Android Box: Smart STB with an Android Box works fine for initial setup and use. However, for a more stable and user-friendly experience, it is highly recommended to switch to an app like Tivimate, which offers a better interface and more reliable server performance for long-term use.
Xiaomi Mi: When using Smart STB with Xiaomi Mi S Box or Xiaomi Mi Stick, the IPTV experience may not be as good as on other devices, such as Apple TV, due to weaker processors in these Xiaomi devices. While the app will still work, the overall experience might not be as stable or flexible. If you’re looking for a more reliable, long-term solution, it’s advisable to explore other devices.
Formula Box: Smart STB with the Formuler Box performs adequately, but the Formuler Box is specifically designed to work with its own IPTV app, MyTVOnline, which provides a much better experience than Smart STB. For optimal performance, we recommend using the MyTVOnline app instead, as it offers a more advanced and user-friendly interface.

Specifications:
- App: Smart STB
- Installation time: Approx. 10 minutes
- Wifi/Cable: Supports both connections
- Cost: SEK 245
- Offers free trial: Yes
Setup Instructions:
Step 1: Download and open the Smart STB app. Once launched, a box will appear. If it doesn’t disappear automatically, press the “OK” button. Accept the app’s terms when prompted, and also confirm that you want a 7-day free trial of the app.
Important: You will need to obtain your Virtual MAC Address and enter it when you request your free trial or purchase our service. This is essential for the setup.
Step 2: After pressing “OK”, you’ll be taken to the settings menu. If you miss this step, the app may freeze with a black screen. If this happens, you may need to restart the app or, in the worst case, restart your device by unplugging the power cord.
Step 3: Select Device Info to retrieve your Virtual MAC address. Make sure to note it down carefully and verify the spelling. Next, choose Embedded Portal to access the settings where you can add a portal URL. Select Portals to proceed.
Step 4: Enable Multiportal mode and ensure that Use Portal 1 is activated. You’ll then be able to add the portal URL by scrolling further down the page.
Step 5: In the Name field, type “svenskiptv.com”. In the URL 1 field, input the Portal URL you received when you requested a free test or purchased our service.
To activate Smart STB and test our service, you must enter your Virtual MAC address (beginning with 00:1A:79) on our website after selecting Smart STB in the menu at the link below: www.svenskiptv.com/packages
Smart STB Subtitles:
Unfortunately, subtitles on Smart STB do not work reliably. If subtitles are a crucial feature for you, it is highly recommended to consider an alternative app. While most channels will automatically load subtitles when the app is started, there are cases where some channels may not have subtitles available. Unfortunately, if subtitles are not available for those channels, there is no way to activate them. In some cases, you may be able to upload your own subtitles from external sources, but this is not something we suggest or support. Our focus remains on providing the most essential features for our customers.
For more information on subtitles for the app, you can usually find answers by conducting a quick Google search or checking the app manufacturer’s website. We wish you the best of luck with your setup! If you need further assistance, feel free to reach out—we’re always here to help.
In summary, subtitles in this app are not the best option, and we recommend exploring other apps if subtitles are a priority for your viewing experience.
Frequently Asked Questions
Common questions about setup, usage, and troubleshooting for Smart STB.
How to Install Smart STB on a Smart TV?
Is Smart STB Free?
No, the Smart STB app is not free. However, they do offer a 7-day free trial so you can test the service before committing. After the trial period, you will need to purchase the full version, which costs approximately SEK 250.